


A jump cut is is an abrupt transition, typically in a sequential clip that makes the subject appear to jump from one spot to the other, without continuity. This can happen when two sequential shots of the same subject in the same scene are cut together from camera positions that vary only slightly. Jump cuts also occur when cutting between two sections of footage shot from the same exact camera angle, for example in an interview. Jump cuts can be jarring. They draw attention to the process of filmmaking and editing, which can take the audience out of the story, so traditionally they are viewed as something to be covered up. However, it’s also because jump cuts draw attention to what is otherwise supposed to go unnoticed that they can be used in strategic and creative ways. Avoiding jump cuts Typically when crafting a scene, jump cuts are avoided by varying camera angles and shot composition. Making sure to cut between close-ups, medium, and wide shots is an easy way to avoid jump cuts. Also, when cutting between two similarly composed shots, a rule of thumb is that the camera position should move at least 30 degrees between the two shots. When you need to cover up jump cuts in an interview, you can do so with supplemental footage, such as clips from a different camera angle, or B-roll. If you have the resources, it’s helpful to shoot an interview from two angles, so that when you need to splice together different parts of the dialogue to tell a story, all you need to do is cut to the other angle and your subject won’t appear to jump in the screen.  If you don’t have another camera, shoot hand gestures and ambiance shots before or after the interview and cut to those. Similarly, another great option is to shoot B-roll and layer those clips over the jump cuts:
  Embracing jump cuts Before you go casting the jump cut as the villain in your next flick, consider its advantages. Jump cuts can be used to show the passing of time, or to speed up a sequence. Casey Neistat loves the jump cut. He often uses them in his videos to speed up sequences where he’s making or doing something, such as decorating his birthday cake:
 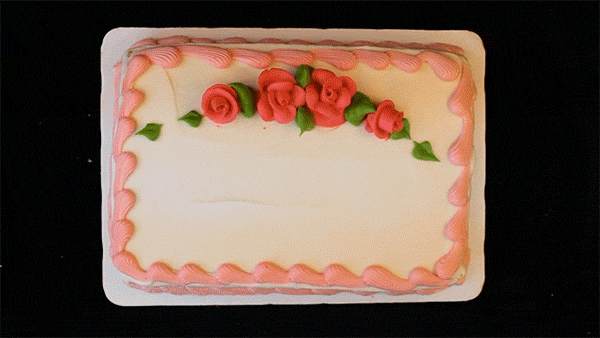 Clip from My Birthday Movie. Jump cuts can be used for a comedic effect. When you cut up a talking head interview or monologue they can emphasize confusion or inarticulateness, such as the sequence in our example video when Dan can’t remember a word. This technique is often used in video blogs. Jump cuts can also be used stylistically, to create a mood and set a creative pace, as in this beautiful video by Lea et Nicolas Features. Jump to just after the one minute mark. That’s where the cuts get extra jumpy!
Be sure to pay attention to the cuts between clips of the same setting, like these beauties:  And don’t forget about the simple yet oh-so-effective jump cut disappearing trick!
 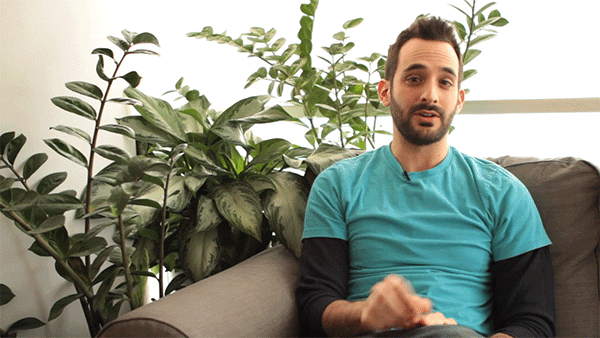 That one never gets old.
Creators with a Vimeo account can use advanced Video AI features such as an AI script generator, intuitive video teleprompter, AI caption creator, and video translator tool to enhance your workflow.


